How to Remove Text From a CapCut Exported Video
Learn the cleanest way to remove text from a CapCut video: delete the editable text layer when you still have the project, or use AI cleanup when the text is already burned into an exported video.

On this page
Still have the CapCut project? Remove the text layer and export again. If you only have a finished video with text burned into its frames, you will need to reconstruct the covered area or use a visible workaround such as cropping.
Start with the source you actually have. An exported MP4 does not preserve an editable CapCut timeline just because CapCut created it.
If you still have the CapCut project
Open the original project and locate the text or caption in the timeline. Select the corresponding layer or caption block, delete it, and preview the affected section before exporting a new copy. For multiple caption blocks, check the whole sequence so you do not remove only one line.
CapCut's Auto Captions help covers editing caption blocks on Web, Desktop, and Mobile. The layout varies between versions; look for the caption or text item in your project's timeline.
The footage underneath an editable overlay is still available. Removing the layer reveals those original pixels. If you imported an already-captioned MP4 into a new project, however, deleting a new text layer will not remove words that were already in that MP4.
If you only have the exported video
First try switching captions off in a compatible player. If they disappear, disable or exclude that separate subtitle track. See hardcoded vs soft subtitles if the result is unclear.
If the words remain in the source frames, they are image content. Reimporting the export into CapCut does not turn those pixels back into editable text. Use the following workflow when no clean source is available.
Remove burned-in text in four steps
1. Upload the best available copy
Open the AI Video Text Remover and upload your video. Prefer the original export to a copy downloaded from a social platform. Repeated compression can soften letter edges and remove background detail before cleanup even starts.
For a difficult scene, prepare a short representative section in your editor first. Include the moments when the subtitle is widest and when a person or object moves behind it.
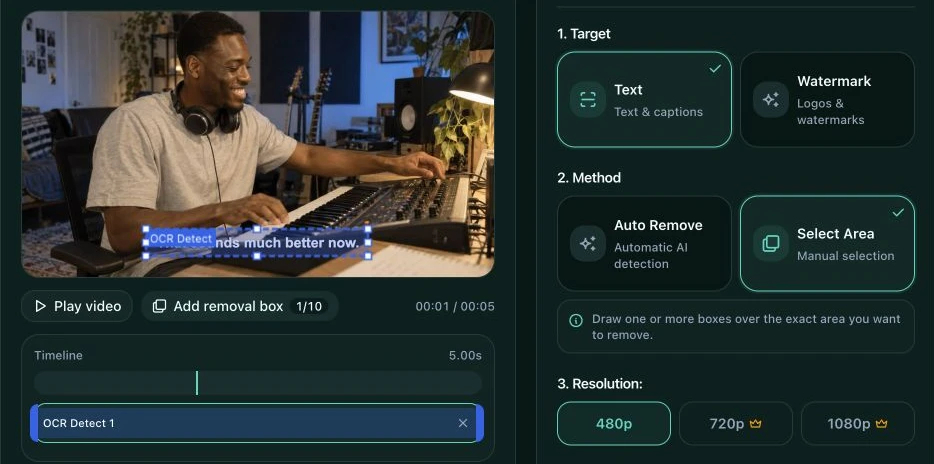
2. Choose Text, then a targeting method
Leave Text selected under Target.
- Auto Remove uses automatic AI detection. It is a useful starting point for clear, high-contrast captions when you want the visible text removed automatically.
- Select Area gives you control over which region to clean. Use it for one particular caption, small labels, stylized text, or words near details you want to preserve.
In Select Area mode, pause on a frame where the full line is visible. Draw around it directly on the preview, or choose Add removal box and resize the box.
3. Check the box across the timeline
Include the complete visible text treatment: letters, outline, shadow, and any background panel you want removed. Keep unrelated pixels outside the box where practical.
Scrub through the clip. A box fitted to a short line can miss the next, longer caption. Moving text may also leave a fixed region. Adjust the area and its time range to cover the text where it actually appears, then check again before processing.
4. Process and review while playing
Choose the output resolution available to your account, check the displayed credit estimate, and select Remove Selected Text or Auto Remove Text, depending on your method.
Review the result at normal speed first. Then pause where a hand, face, or detailed object passes behind the old subtitle. Look for remaining letters, softened texture, unstable edges, or a repair that pulses as the camera moves.
Completed text removal offers 2 free adjustments. If the target was too broad or missed an outline, change that specific part of the setup. A smaller box cannot guarantee an exact reconstruction of detail that was hidden by the text.
When cleanup is more difficult
The background matters more than the app that added the text. A stationary label over a plain wall gives the model simpler visual information than a subtitle crossing moving fingers, hair, patterned clothing, or reflections.
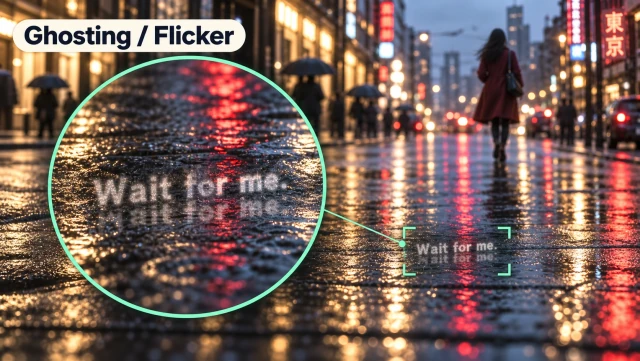
Animated titles and large lower thirds may cover a changing area for much of the clip. Test a representative section before processing a long export. If the output looks blurry, ghosted, or unstable, use the symptom-by-symptom troubleshooting guide.
When cropping or covering makes sense
Cropping can remove a caption at the extreme edge if you can lose that part of the composition. Check the final aspect ratio and whether the crop cuts into a person or subject as they move.
A new graphic can hide old text when a visible replacement is acceptable. It does not restore the covered scene. Likewise, CapCut's freeze-frame, crop, and overlay technique reuses a clean patch from another frame; camera movement or changing light can make the patch stand out.
Use the method that fits the delivery: a clean re-export when you have the project, track removal for separate captions, or targeted reconstruction when only the burned-in file remains.