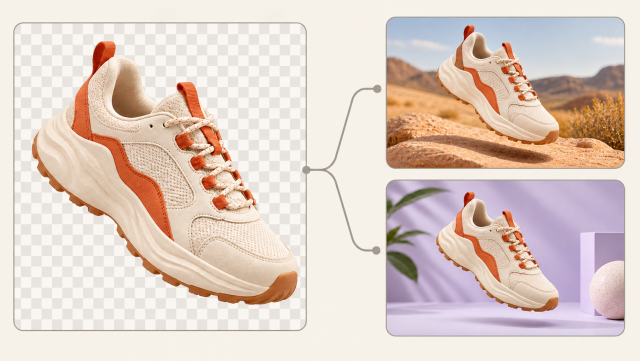
How to Remove Background From Video Without a Green Screen
Remove background from video without a green screen using AI. Learn the settings for transparent, solid-color, and green-screen results, with audio options.

On this page
You can remove background from video without a green screen by using AI to separate the foreground from the surrounding scene. You do not need to reshoot a presenter against a green wall just because the original recording contains a busy room.
Use the AI video background remover to turn an existing recording into a transparent cutout, a clean solid-color clip, or a digital green-screen asset. The steps below show which settings to choose for each result.
This guide covers ordinary footage, not a chroma-key effect that only works on green pixels. In RemoveFrom.Video, you select the background result and output format before starting the processing job. After processing, you inspect and download that result.
Choose the result before you start
Decide whether the next step needs a reusable cutout or a finished, opaque video:
| Your goal | Background setting | Output choice |
|---|---|---|
| Reuse the subject over another scene | Transparent | WebM or MOV |
| Give the subject a clean solid backdrop | Color Background | Choose a color, then a compatible format |
| Deliver footage for a chroma-key workflow | Green Screen | MP4 is an opaque delivery option |
The current tool provides transparent, preset solid-color, and green-screen outputs. To place a photograph or another video behind the subject, export a transparent result and do that composition in your editor.
How to remove background from video without a green screen
1. Choose a representative source clip
Open Remove Background From Video and choose your video. Use an original file rather than a repeatedly compressed social-media download. A short sample with moving hair, hands, or props is more informative than a perfectly still frame.
You do not need to crop the background away first. Cropping changes the composition; background removal isolates the subject inside it.
2. Select the background output
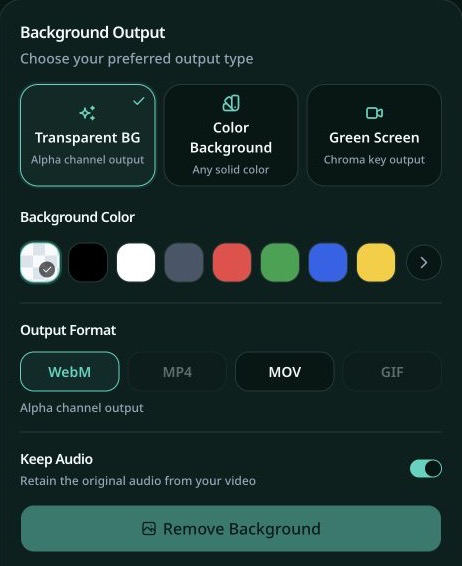
Choose Transparent to keep a reusable cutout. Choose Color Background for a preset solid color, or Green Screen when another application expects chroma-key footage.
For a transparent result, use the actual Transparent mode rather than selecting a black or white background and expecting that color to disappear later.
3. Set the format and audio
Choose WebM or MOV for Transparent output. MP4 and GIF are not available for that mode in this tool. With an opaque color or green-screen background, the format choices include MP4, WebM, MOV, and GIF.
Leave Keep Audio enabled when the original sound is needed. GIF cannot retain audio. Sign in if prompted and check the displayed credit requirement before submitting the job.
4. Process, inspect, and download
Start the removal job after choosing those settings. Play the result when it is ready. Inspect more than the thumbnail: a cutout can look clean in one frame but lose a finger or flicker during motion.
Download the result that matches your next workflow. A different output selection is not a guaranteed free conversion of a completed job; check the processing and credit information before submitting again.

Why AI works without a green screen
Chroma keying removes a chosen color. AI background removal instead estimates which visible regions belong to the foreground. Manual rotoscoping uses edited masks when more control is needed.
| Method | Starting point | Main advantage | Important limitation |
|---|---|---|---|
| AI background removal | Ordinary recorded footage | No controlled backdrop required | Difficult edges still need inspection |
| Chroma keying | Footage shot against a controlled color | A planned, repeatable keying setup | The screen color can overlap the subject |
| Rotoscoping | Footage with editable masks | Detailed manual control | Requires more editing work |
Adobe's keying documentation explains the separate role of color keys and corrective mattes. A good physical green screen remains useful when you control a shoot; AI is particularly helpful when the video already exists.
Check the difficult parts of the video
Look at hair, narrow straps, glasses, fingers, and objects crossing the subject. Fast motion, a heavily compressed source, and a subject that blends into the wall are good reasons to test a short section first.
For reusable transparency, open the downloaded clip in an alpha-aware editor and put a light layer and then a dark layer underneath it. This reveals missing regions and edge fringes that a checkerboard preview can hide.
The source, motion, and scene determine which details need checking.
Finish the workflow in the right application
For a transparent asset, follow the transparent-video guide. It explains how to confirm that the downloaded file still contains usable transparency.
For an opaque MP4 with a photograph or video backdrop, put the transparent subject above that backdrop in your editor, then export the finished composition. Renaming a transparent WebM to .mp4 does not perform that conversion.
For a green-screen deliverable, select Green Screen output instead. You are creating a colored background to key out later, not exporting an alpha channel.
Common questions
Does a white wall count as a green screen?
No. AI removal can process an ordinary scene, including a white wall. A traditional green-screen workflow relies on deliberately controlled color separation. The methods should not be confused just because both can produce a cutout.
Does removing the background also remove the sound?
Not when you keep audio enabled in a supported video format. GIF is the exception: it has no audio track.
Can I change the background to a photograph here?
The current tool offers transparency and preset solid-color backgrounds, including green-screen output. For a photograph or moving background, compose the transparent download in another editor.
What should I do if the hair or hands look wrong?
Check the source and a short moving section before committing to a longer job. Use the least-compressed source available. For precise repair of an unusually difficult mask, use an editor with mask-refinement tools rather than repeatedly changing only the file extension.